View in gallery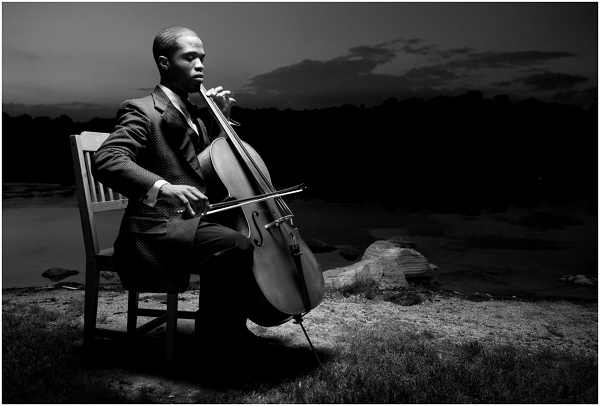
(portrait by David Hobby of Strobist)
In a way, we’re all portrait photographers– and our Facebook walls are evidence. We use the digital cameras in our phones, our point-and-shoot cameras or our DSLRs to capture memories of the people in our lives. Some of us are really good at it, others are not. What separates a good portrait and a bad one, and how can you make sure to always capture your subject at their best? Read on as we explore the techniques, tools and tips needed to create the perfect photographic portrait.
Cameras for Portrait Photography
View in gallery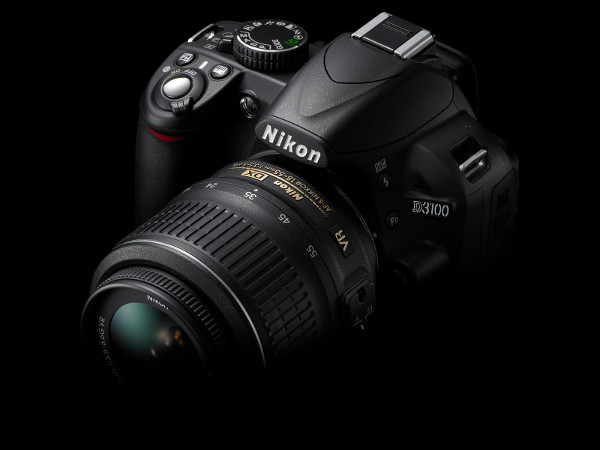
There is no such thing as the “right” camera for portrait photography. A professional can get as much out of a two-year-old point-and-shoot camera than a beginner could get out of a brand new, flashy DSLR. In some cases, even an iPhone can be competitive against a pricey, dedicated alternative. That said, if you love photography and want to put a lot of effort into making portraits, a DSLR camera will provide the greatest level of flexibility and control over your image.
Digital SLR cameras feature interchangeable lenses and flashes that can be swapped to suit the needs of the photographer. When compared to point-and-shoot cameras, they may appear to be complicated, but they are easy to use once you understand the basic elements. Even then, most modern DSLRs feature an automatic mode which will certainly get you by when taking portraits. The ability to change lenses and flashes provides a lot of power for a photographer that we’ll explore later. For now, understand that an investment in a starter-level DSLR, like the Nikon D3100, the Canon EOS Rebel T3 or the Sony Alpha A57, is an upgrade you’ll likely cherish.
While point-and-shoot digital cameras are more limited than DSLRs, they still produce an image of admirable quality. If you understand the basics of photography, you can create great portraits with these cameras that might even make professionals blush. Even that tiny lens on the back of the iPhone can produce nice quality images if you know what you’re doing At the end of the day, the guidelines are the same no matter what camera you use.
Tip: Buying a used DSLR is a great way to get pro quality and flexibility for the price of a point-and-shoot camera. For example, the Nikon D40, which sold between 2006 and 2009, can be had for roughly $250 on eBay with an included kit lens.
Portrait Photography Basics
There are a handful of fundamentals to keep in mind when shooting a portrait, and the same is true of almost any subject of photography. It’s important to consider lighting, background and framing when taking any photograph, and they’re especially important when shooting a portrait.
Lighting
View in gallery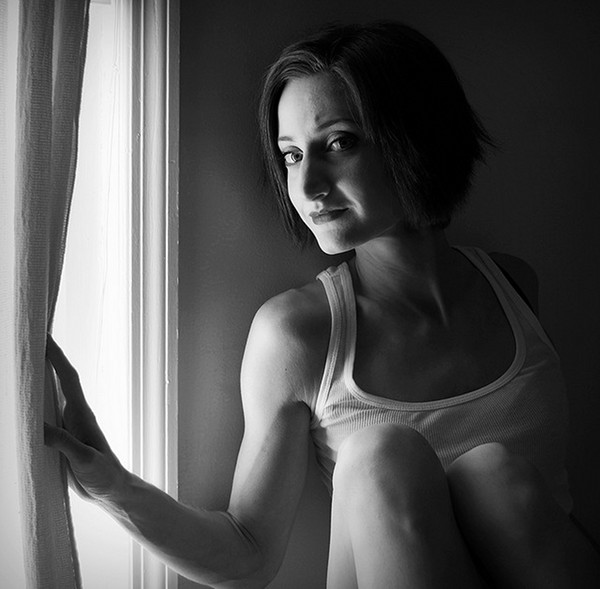
(photo by Anna Leavitt via flickr)
Even the most basic camera can produce a nice, clean image at the brightest time of day. But every camera, even the most advanced DSLR, has trouble in low-light scenarios. When setting up your shot, you need to first take into account the amount of light and its position relative to your subject. An afternoon sun can cast a lovely light on your subject, but if the light is behind the subject all the camera will see is a silhouette. In low light scenarios, a camera will attempt to increase its light sensitivity (or ISO), but the result will be a grainy, “noisy” image that has lost its crispness. It’s important to think about how the lighting will be handled by your camera and adjust accordingly. Sometimes that means moving your subject, other times that involves moving the camera, and other scenarios require you to add a little light of your own– using a flash or a light reflector.
Tip: When possible, try to shoot in one of the two “golden hours” of the day. The hour after sunrise and the hour before sunset provides a soft, warm light on your subject and the background. It’s a well-known discipline that most photographers, portrait or otherwise, utilize regularly.
Background
View in gallery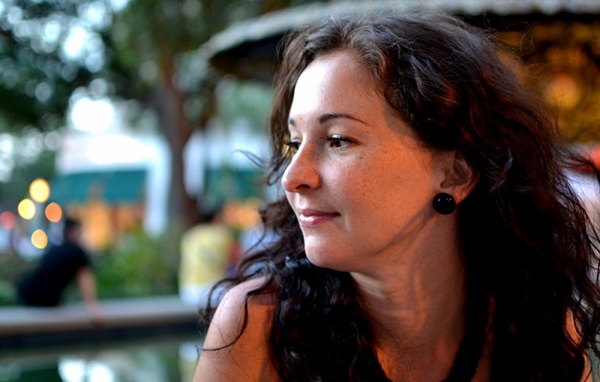
What is behind your subject is often just as important as the subject itself. A good pose in a messy room still makes for a bad portrait. Try to set your subject in a scene where they stand out, where there is little to grab the attention of the viewer beyond the subject. A wall with a nice texture, from brick to wallpaper, can be a great background. A cityscape or a forest can make for a great background. When you’ve placed your subject in a nice scene and are ready to snap away, you can then use some technical tools to make a good scene into a great portrait. If your camera gives you control over its aperture setting, or the width of the opening of the lens, you can give the background a nice, soft blur if you use a wide aperture setting. This background blur is called “bokeh”, and is a revered term amongst professionals and hobbyists alike.
Tip: If you can’t control the aperture setting of your camera, you can create the impression of background blur by moving the camera away from your subject and then zooming in to split the difference. This will work on an expensive DSLR too.
Framing
View in gallery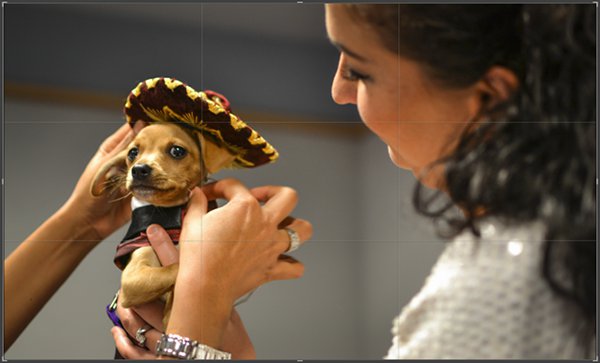
What you include in your frame and where you place your subject are very important. There’s a common rule for photographers called the Rule of Thirds that is based on the way the human eye observes a photograph. While beginner photographers may have trouble fighting the urge to place their subject in the center of the frame, moving them to the left or right of center, or above and below center, will create a more dynamic image while guiding the viewer’s eye in the most natural way. In the photograph above, you can see the faint lines where the image was divided into threes, vertically and horizontally. I framed the image so that my subject, Jones the Chihuahua, was roughly centered on the left third of the image. By placing his holder on the right third, the image feels more dynamic and the scene is established. A dead-center shot of Jones would not have the same balance, the same emotion as this one. (if you’re a dog lover, you’ll be happy to know that Jones was adopted after I took this photo at a charity event for the Humane Society of Tampa Bay).
Tip: Most cameras have built-in guides for the rule of thirds in the viewfinder. Use those to help you balance your subject off of center. If you don’t see them, you may be able to manually turn them on in your camera’s settings.
Coaching Your Subject
View in gallery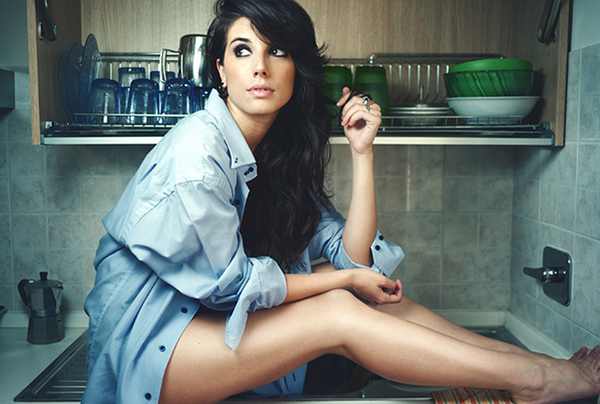
(photo by Astragony via flickr)
Many people become nervous in front of the camera. A nervous expression can make for a bad portrait, so it’s important for you to make your subject feel comfortable and to guide them along through the process. Whether you’re shooting a candid photograph of friends or a model in a studio, a little coaching can go a long way. In the latter scenario, you want to encourage your subject to move naturally in the setting and give them feedback when you see something you like. I often suggest that a model loosens up and then tries a series of poses. When I see something I like, I give them encouragement and ask them to hold a specific pose. As the shoot progresses on, a subject and the photographer can build a rapport which leads to a comfortable shoot and a great resulting photograph.
If you are shooting a model, don’t overstep your bounds with your encouragement. Use language you’d use with a stranger on the street, not someone you know intimately. Also, when trying to get a specific pose, you can always act out the pose yourself (which might inspire a laugh or two, but laughs are invaluable for calming the mood on set!). Never touch your model unless they’ve given you permission to do so.
The interaction between a photographer and the subject is one way that distinguishes portrait photography from any other style. You don’t need to ask a dish to give you a smile with teeth when you’re shooting food photography, and you don’t need to ask a building to shift its shoulders during an architectural shoot. Building an understanding of a subject’s mood and how to guide them through a shoot is one of the most important disciplines a portrait photographer should master.
Tip: If you have a nervous subject, tell them you need a few minutes to figure out your camera and/or light settings and welcome them to relax. Snap away during these few minutes and talk to your subject about everyday subjects. You’ll often find that these “set up” images show your subject’s natural personality. These can often make for the best shots of the session, especially with a nervous subject.
Lighting Your Subject
View in gallery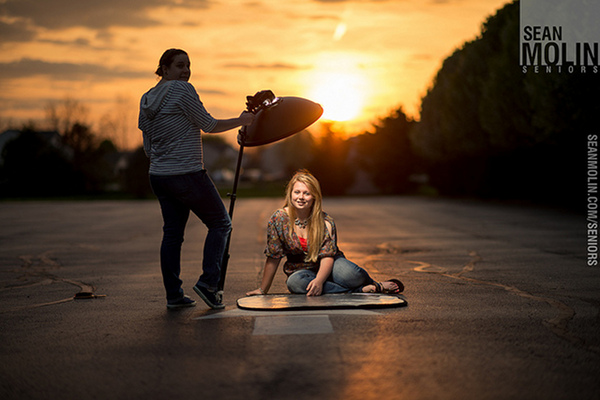
(photo by Sean Molin via flickr)
Indoors or out, if the available light is not cutting it you may need to add some of your own. You can do this by using flash photography or reflecting the available light onto your subject. When photographing the soft contours of the human face, you’ll usually want to opt for a nice, soft light source. And when adding your own light source, you want to try to move that light off-axis with your camera.
Diffused light is soft light, and there are tools photographers can use to diffuse their light sources. If you want to add light to an outdoor shot where the sun is accessible, you can use a reflector or even a cheap piece of white foam core board to reflect the light. The sun will bounce off of the white board, effectively turning the sun into a larger, softer second light for your subject. If you’re using a flash, you can use a photographer’s umbrella to diffuse the light, you can use a softbox or even a plastic attachment that fits over the flash itself. Even when the available sunlight is sufficient enough to light your subject, you can place a large screen diffuser between the sun and your subject to effectively soften the light. Ultimately, soft light will cast a nice, even light over your subject without harsh shadows or hot spots.
If you’re using a flash unit on top of a DSLR, your goal should be to get that light off of your camera and trigger it externally. There is a whole movement of photography that was championed by photographer David Hobby, whose Strobist blog guides new photographers through the value and use of off-camera flash. Separating your flash from your camera allows you to light your subject in ways that have been faithfully used in art since Rembrandt in the 1600s. A one-light portrait with an off-camera flash can be all you need to create stunning, professional-quality portraits.
Tip: If you don’t have a DSLR or you don’t have the budget to buy a flash unit, you can experiment with standard lamps or even work lamps from a hardware store. While you won’t want to rely on these lights long-term, you can learn how to properly light a portrait with lights you have at home, so long as you can adjust their power and move them around. Then you can experiment with true three-point lighting techniques.
Editing Your Portraits
View in gallery
(photo by Cayusa via flickr)
When you’re finished with your photo session, you’ll want to take a closer look at them in a photo editor to try and correct any glaring flaws in the image. Hopefully, with proper lighting, coaching and camera technique, you may not even need to touch your image in post. If there’s something you or your subject won’t like, there are ways to repair them in common editing software.
The most common flaws that show in a well-composed, well-lit image are skin blemishes like pimples, scars or age lines. A loose hair or two (or many more) can complicate a nice face, and wrinkled clothing can draw the eye away from your focal point. Also, even well-lit photographs can have lighting imbalances that take away from an image’s purity. Most of the time, these can be handled in premium tools like Photoshop or free tools like GIMP. In Photoshop, the spot healing brush can be a gem for pimples, age lines and loose hairs. Other jobs may require the clone stamp tool, which samples from one part of the image to replace another. Last, the dodge and burn technique can be used to lighten or darken areas that are too dark or too bright to a distracting degree.
Using photo editors like Photoshop is an art in and of itself, and can require as much education and attention as developing your photographic technique. Since photographic technique is largely the work of practice and more practice, you’ll find the same of Photoshop. Fortunately, you can learn plenty about photoshop and its use without leaving your computer. Photographic technique is a harder hill to master.
Tip: If you’re using a photo editor on your computer, be sure to save a copy of the original file. If you save the same file after making a mistake, you won’t be able to go back and undo it!
– – – – – – – – – – –
Thanks for reading, fellow photographer. If you have a tip to share on how to nail a good portrait, be sure to share it with us in the comments!